| Snake | Rabbit | Bear | Desert | Dog | Lobster |
 |
 |
 |
 |
 |
 |
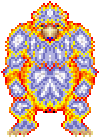
Finding Desert Wanderer
Finding Desert Wanderer
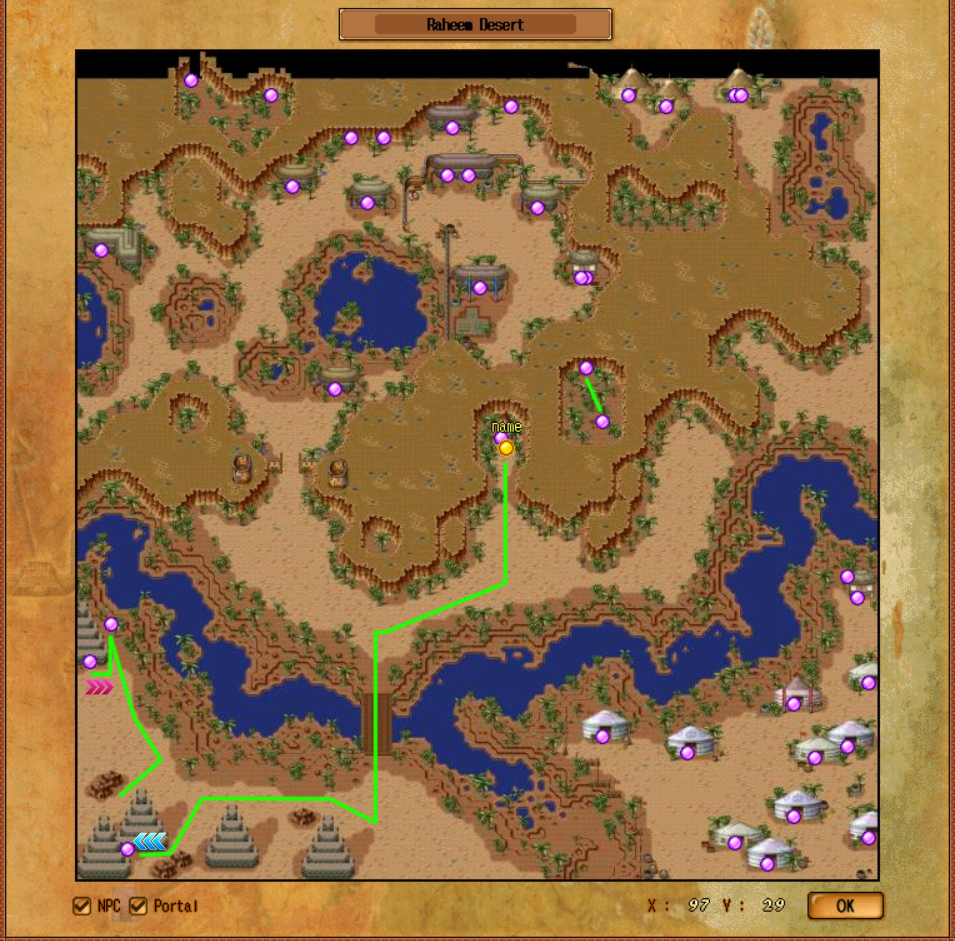
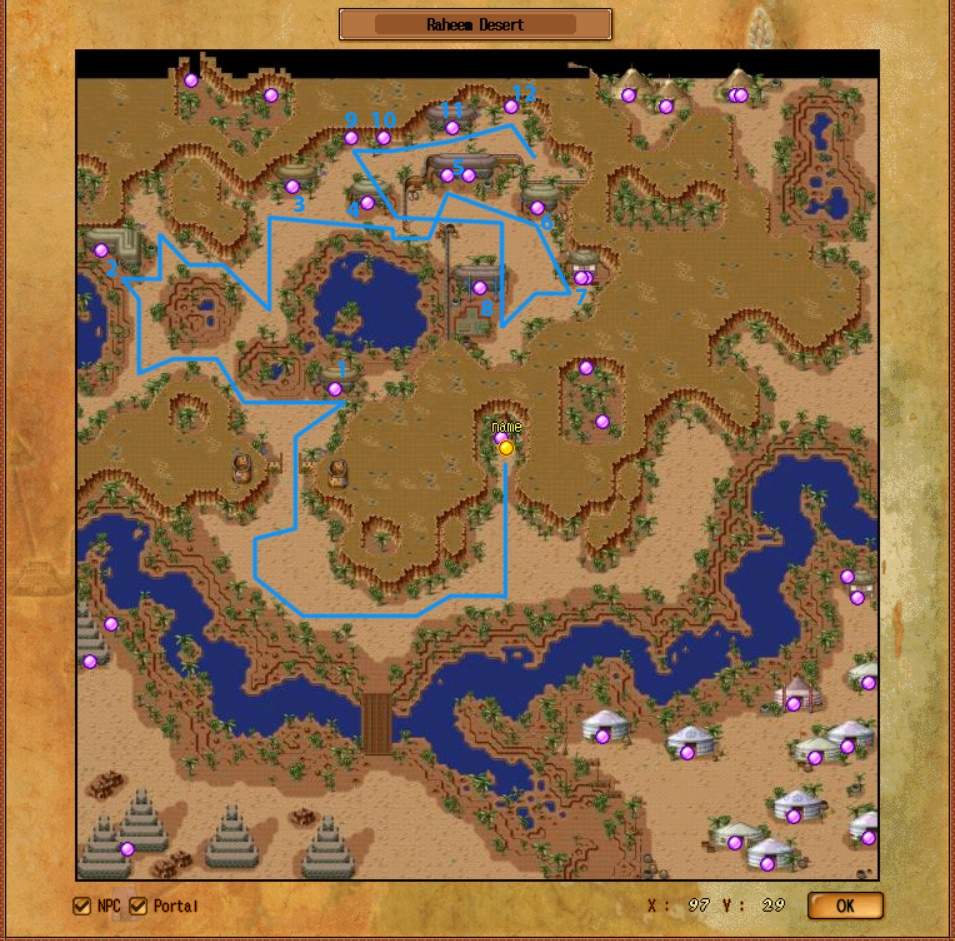
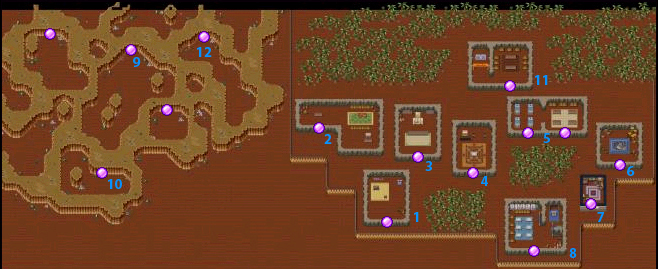
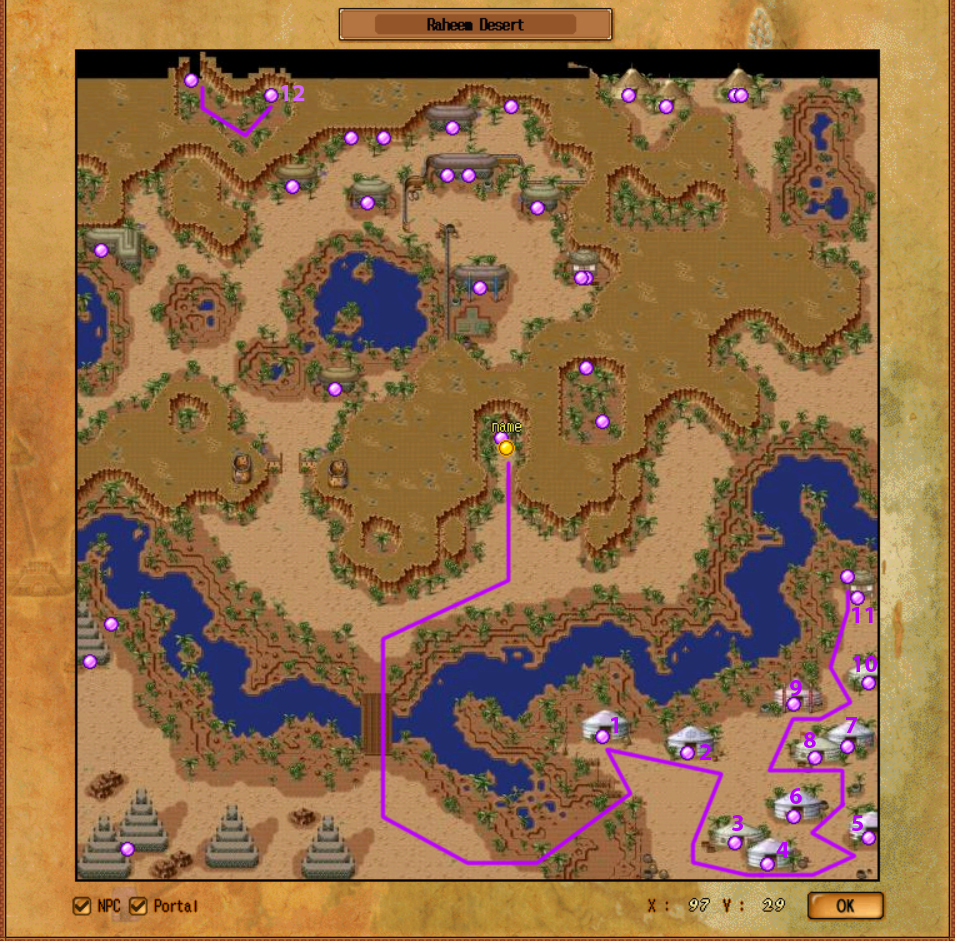
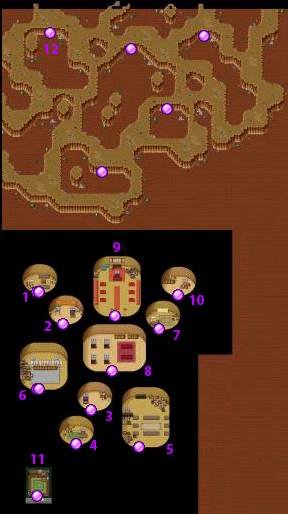
The size of the map can make locating the Desert Wanderer a difficult task. But if you follow these paths, you will find both Desert Wanderers.
| Bottom-Left | Top-Right | Top-Left | Bottom-Right |
Don't forget to Screenshift to check corners and Refresh (ctrl+R) to see behind objects.
| The Bottom-Left Path |
|---|
| Start here first! |
 |
| Forgotten Places |
 |
| This video illustrates how to navigate the Bottom-Left Path. |
| The Top-Right Path |
|---|
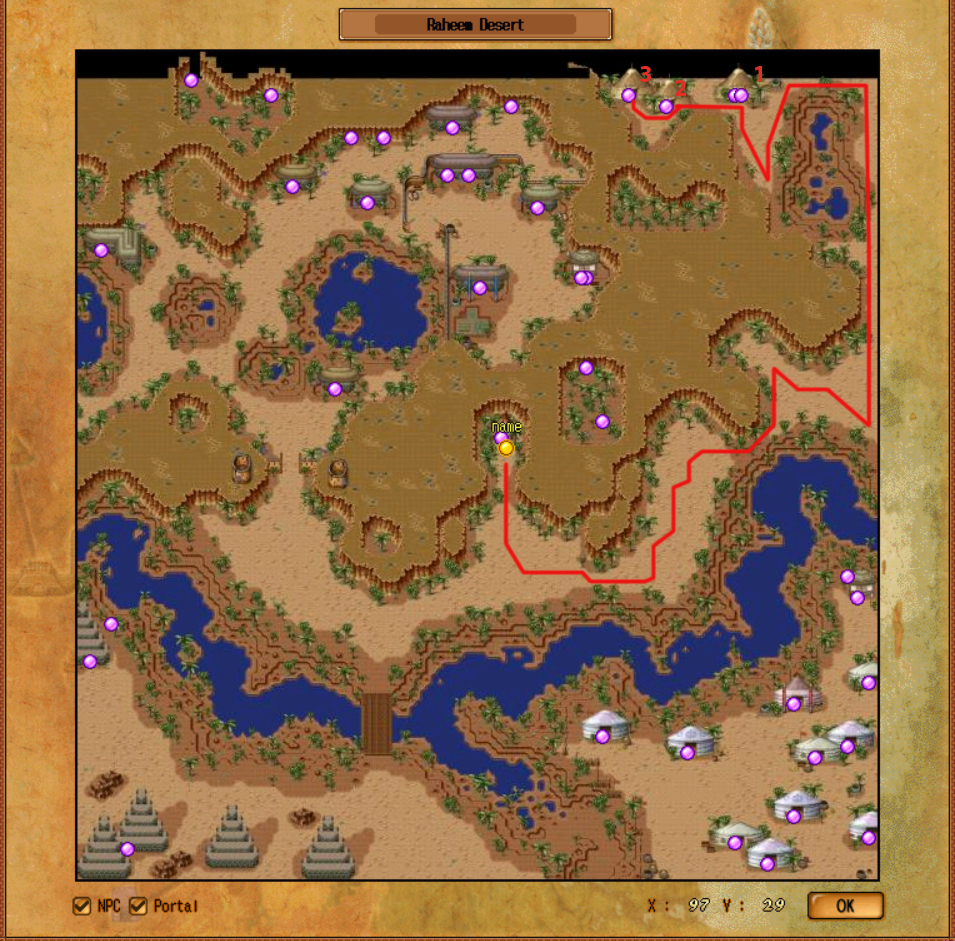 |
| Forgotten Places |
 |
| This video illustrates how to navigate the Top-Right Path. |
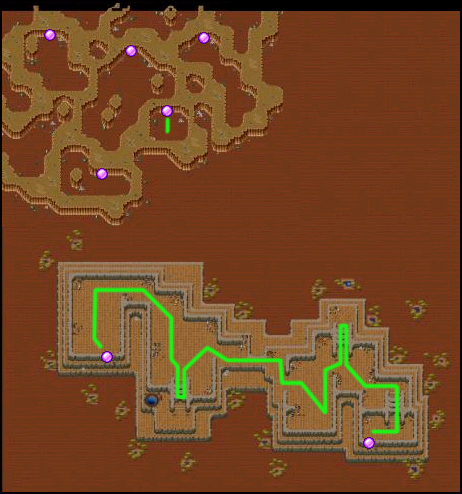
| The Top-Left Path |
|---|
 |
| Forgotten Places |
 |
| This video illustrates how to navigate the Top-Left Path. |
| The Bottom-Right Path |
|---|
 |
| Forgotten Places |
 |
| This video illustrates how to navigate the Bottom-Right Path. |
Killing Desert Wanderer
Killing Desert Wanderer
WARNING: This boss will push, spawn dune wasps when there are less than 4 nearby, world cast "prevent Invisible" in caves 3 & 4, and at low red, will stop moving.
SOLUTIONS: The boss will move towards you if you are more than 5 tiles away and won't cast his spells if it is slept.
| Solo 99 Rogue |
|---|
| Use "Flash Trap" to prevent boss from attacking. |
| Solo Sa San Rogue |
|---|
| Avoid sleep trapping the boss once you begin to kill. |
| Solo Il San Mage |
|---|
| Very simple with mage orbs. Don't sleep the boss once you begin to kill. |
| Solo 99 Poet |
|---|
| You'll need the Orb of Lethal Strike for this. |
100 Desert Wanderer Kills
This video should give you rough approximation of drop rates.
| DESERT WANDERER 100!!!!! |
|---|
| Expect volatile drop rates. |
Click on the headings to expand each section.